When I created a landing page for my eCommerce consulting business I had to use Contact Form 7 plug-in for WordPress. Contact Form 7 is very popular solution, but probably not the most user-friendly, so if you want to integrated it with Google Analytics to measure your conversion it is becoming a little bit tricky.
After quick search I’ve found couple guides how to do it:
- http://contactform7.com/tracking-form-submissions-with-google-analytics/ – this one is from plug-in author, but covers old Google Analytics code, not the latest Universal one
- http://www.astralwebinc.com/contact-form-7-wp-how-to-add-event-tracking-on-new-universal-google-analytics/ – is about integration with New Universal Google Analytic
The second guide is a good start, it tells you how to set-up event tracking, but if you want to set-up goal and track conversion you need to do few extra steps. For the sake of having a complete guide, I’ll describe below the whole process of setting up Universal Google Anallytics goal for Contact Form 7 WordPress plug-in.
1. Create your Contact Form 7
Follow the usual process of setting up contact form for your WordPress website using Contact Form 7 plug-in. If you need help with that, check the official documentation, it is pretty comprehensive.
2. Tracking code
At the very bottom of new form creation screen you’ll find a section called Additional Settings
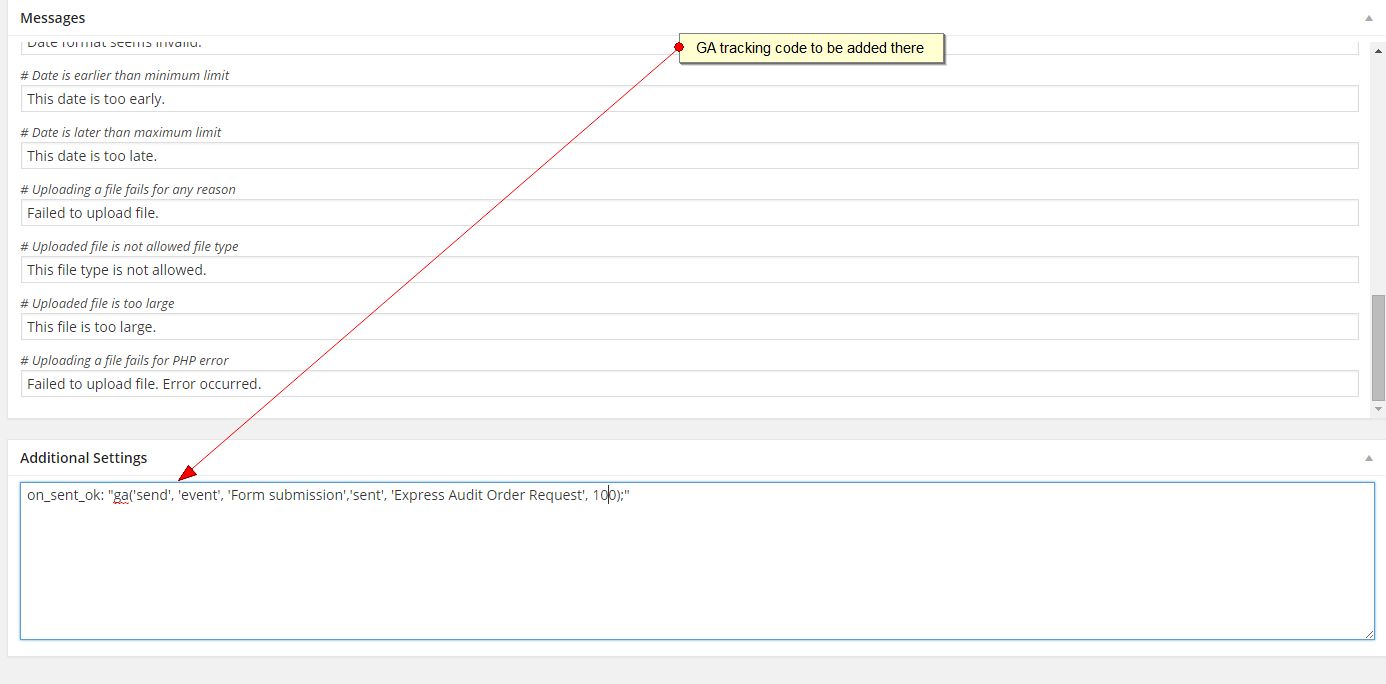
In this box you’ll need to insert a piece of code that will send to Google Analytic a notification when the form is successfully submitted.
The code should look like:
on_sent_ok: “ga(‘send’, ‘event’, ‘Form’,’sent’, ‘ Service Request’, 100);”
The parameters in brackets can be customised:
- ‘send‘ and ‘event‘ have to stay as is, don’t change them;
- Form is Category name
- Sent is Action
- Service Request is Label
- 100 is value (should be number)
If you need more in-depth description of the parameters you can check Google Analytics help.
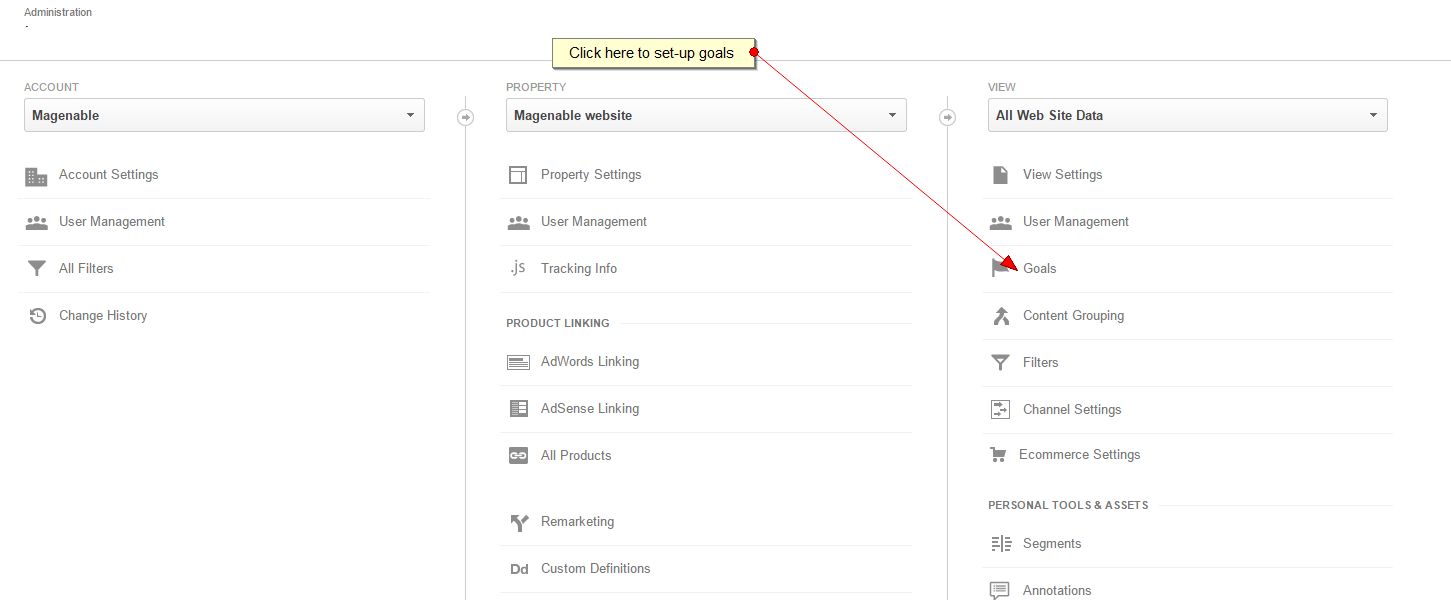
3. Setting up goal in Google Analytics
Log-in to your Google Analytics account and go to Admin, select your account, property, view and click to Goals
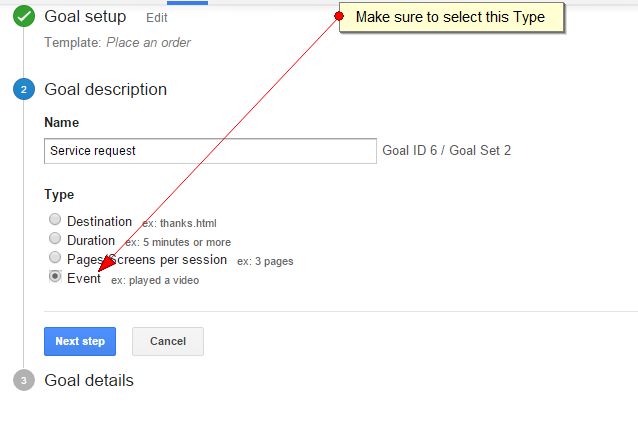
Click New Goal button at the top of list of your existing goals, then select an appropriate template. I have used Revenue/Place and order, since my landing page form was a request for service, then click Next button
On the step 2 select select Event as a type of the goal. You can also define here you own name for the goal. Then press Next step button.
At the final stage we need to define event parameters.
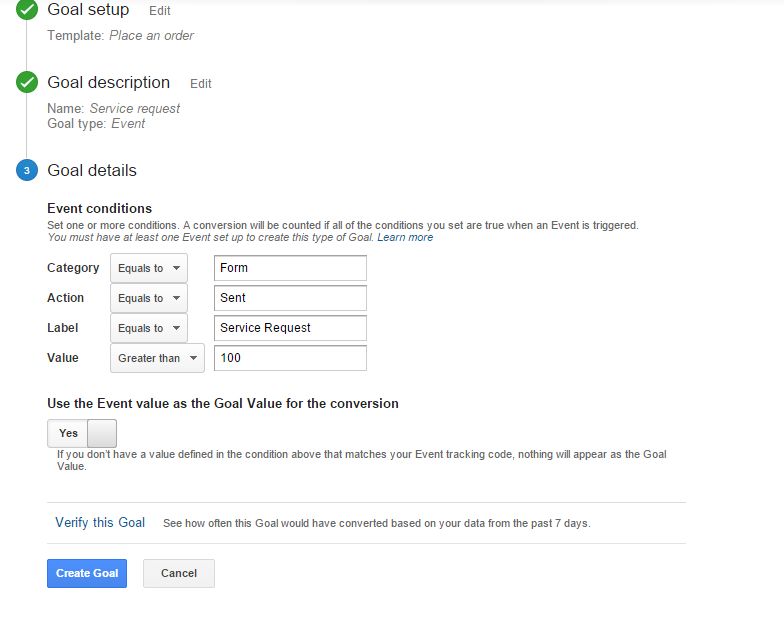
Here you’ll need to use the parameters you’ve defined when you customised the code at step 2. Using the data from our example we copy:
- Form to category field
- Sent to action field
- Service Request to label
- 100 to value
That’s it, click to Create Goal button and your goal is created!
Important note
Make sure that the page where you set the form with the code has Universal Google Analytic tracking code, without the code the form will not work properly – submissions will not be tracked and moreover, your website users will not see success/thank you message after they submit the form.
If you are not sure does it exist, use View Page Source functionality of your browser and check for it. It should look like one on the screenshot below (with your individual number after UA).
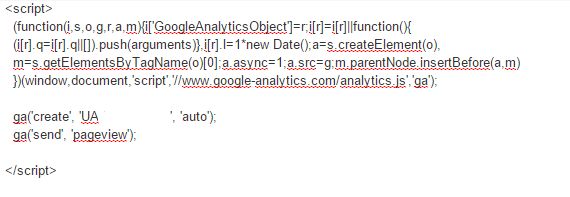
You can find your code in Admin/Property/Tracking Info section of your Google Analytics.