Some time ago I subscribed to take part in Google Optimize beta program and recently ago my invite. In this post I’ll write about how I set-up couple simple experiments using this new tool.
What is Google Optimize
Google Optimize is a tool to conduct tests of website on real users, so you can see what content or design performs better. It helps you to make truly data-driven decision: avoid guessing and relying on HIPPO (highest paid person opinion) when you optimise website KPIs. So next time when you are not sure, should you have or have not a video or a big hero image on the product page you can conduct an experiment, measure the performance of different versions and select one that provides better conversion.
The concept of such tests isn’t entirely new, there are number of products available on the market that can help you with this job. The most popular are Optimizely, VVO and Adobe Test and Target. However there are couple good reasons why Google Optimise may worth your attention:
- it is free (to be precise there is also paid version called Google Optimise 360 with extended functionality)
- It has native integration with Google Analytics, which is the most popular web analytic tool
Signing up to Google Optimize
At the moment Google Optimize is in Beta, so you need to sign-up on this page to get invite. Google doesn’t specify how long you need to wait for invitation, for me it was over 3 months. Probably it will take less time now. Once you get your invite you can access Google Optimise.

Important to note that to use Google Optimize you must have an account in Google Analytics to link. You also have to work in Google Chrome browser to use visual editor extension required for A/B and multi-variate tests.
Creation of account, container and experiment
Google Optimiser has the next hierarchy of objects:
- Account is a top level of organisation hierarchy. It can be for example a business name or brand for complex organisation
- Container is a web property where you will run an experiment, typically a website
- Experiment is an experiment itself, where you define what exactly you will test (different colour of a button or completely new page layout). At the moment you may run up to 3 experiments per container in free version of Google Optimize
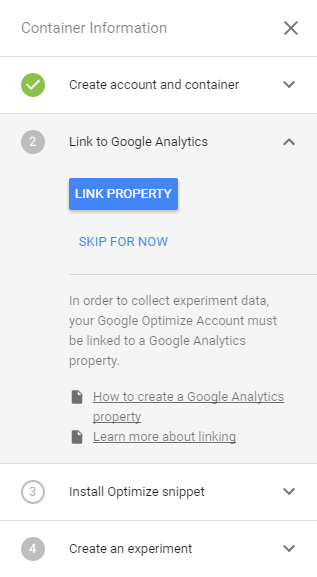
Once you created an Account and Container you need to link Container with Google Analytics property in order to collect experiment data and see reports. You may link more than one Google Analytics view with Google Optimize Container
Google Optimize code snippet
The next step is to add Google Optimiser Snippet to your website. It looks like
<script>
  (function(i,s,o,g,r,a,m){i['GoogleAnalyticsObject']=r;i[r]=i[r]||function(){
  (i[r].q=i[r].q||[]).push(arguments)},i[r].l=1*new Date();a=s.createElement(o),
  m=s.getElementsByTagName(o)[0];a.async=1;a.src=g;m.parentNode.insertBefore(a,m)
  })(window,document,'script','https://www.google-analytics.com/analytics.js','ga');
  ga('create', 'UA-XXXXXX-XX', 'auto');
  ga('require', 'GTM-XXXXXXX');
  ga('send', 'pageview');
</script>
The snippet is a modified version of standard Google Analytics snippet, so if you already have on installed, you need just add a line of the code to existing Google Analytic code. This line is
ga('require', 'GTM-XXXXXXX');Make sure that you replace the GTM- and UA- starting ids with actual ones from your Google Analytics and Google Optimize.
It is also recommended to set-up a code that hide content while it loads to avoid the situation when original content is displayed for short time before random variant is applied. Page hiding code:
<style>.async-hide { opacity: 0 !important} </style> <script>(function(a,s,y,n,c,h,i,d,e){s.className+=' '+y;h.start=1*new Date; h.end=i=function(){s.className=s.className.replace(RegExp(' ?'+y),'')}; (a[n]=a[n]||[]).hide=h;setTimeout(function(){i();h.end=null},c);h.timeout=c; })(window,document.documentElement,'async-hide','dataLayer',4000, {'GTM-M8H3P4D':true});</script> It should be inserted to HEAD section of page just before Google Analytics code.
You may also add Google Optimize tag through Google Tag Manager.
Experiment
The next step is to create experiment itself
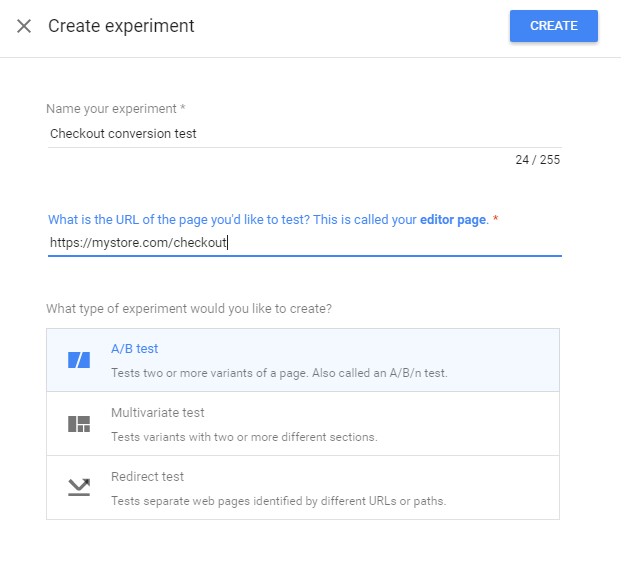
At the moment it supports 3 types of experiments:
- A/B tests
- Multivariate tests
- Redirect tests
I’ve tried so far A/B test and Redirect test, both of them are described in more details below.
A/B test with Google Optimize
To test A/B test I decided to create a version of a quite popular page of this website. Just for the sake of testing I decided to add a hero image at the top of the page.
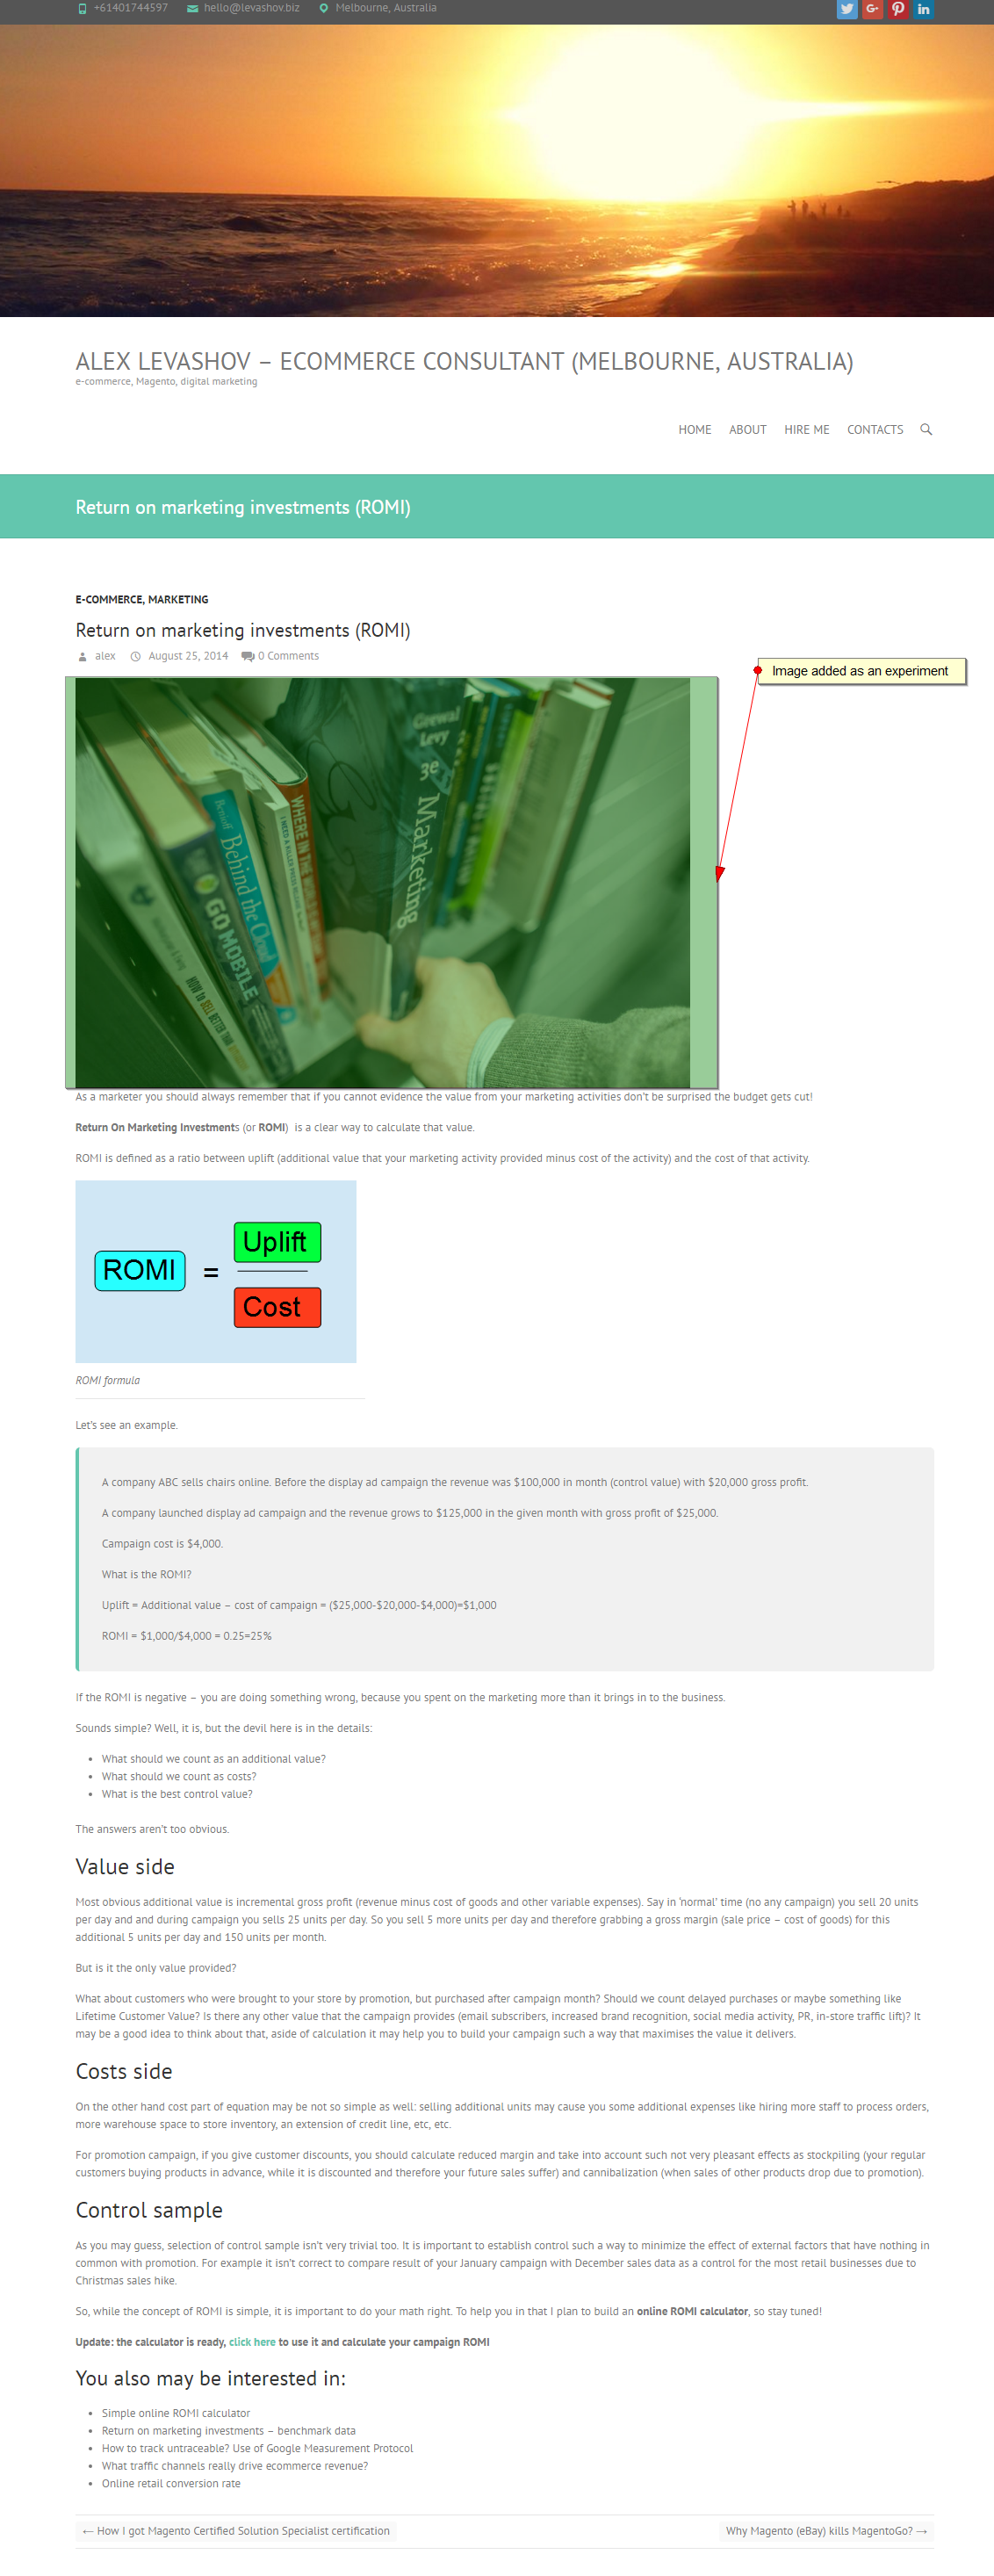
The experiment is still running, so if you visit this page you may see a version with and without image.
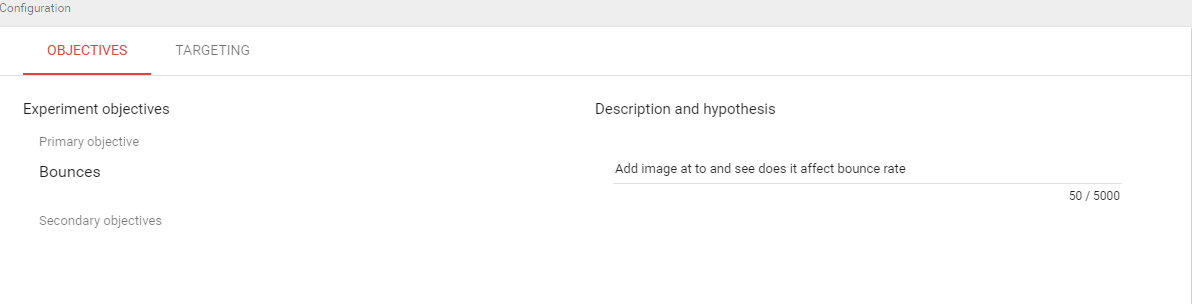
Google Optimize allows you to define different experiment objectives including:
- Bounce rate (which I used)
- Pageviews
- Session duration
- Goals from Google Analytics (that is where you have flexibility and optimise for number of sales or newsletter sign-ups)
There can be more than one objective (up to 3)
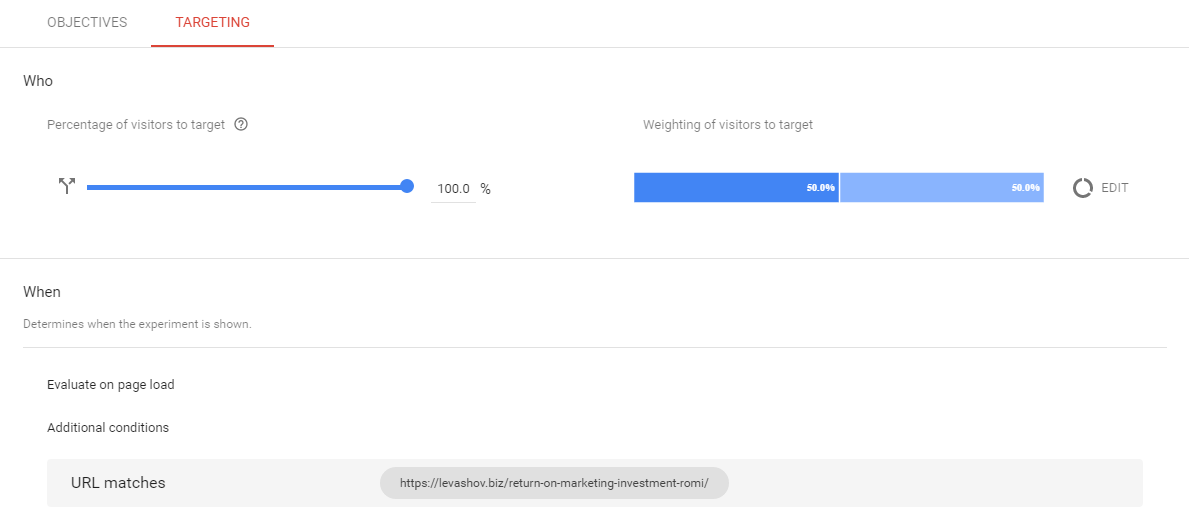
In Targeting you define what part of visitors will be included in the experiment and how to split them between page versions. You can also target part of your website visitors based on parameters available in Google Analytics, for example limit your test only for visitors using mobile devices. There is also a possibility to decide When target using number of rules including pretty advanced like Datalayer variable targeting.
Once you set-up experiment objectives and targeting you need to create a variation of the page you testing (Original, also referred as editor page). To help with that you Google provides a visual editor in form of Chrome browser extension The extension provides a visual interface that allows you to change existing page elements or add new. In my experiment I added a new image.
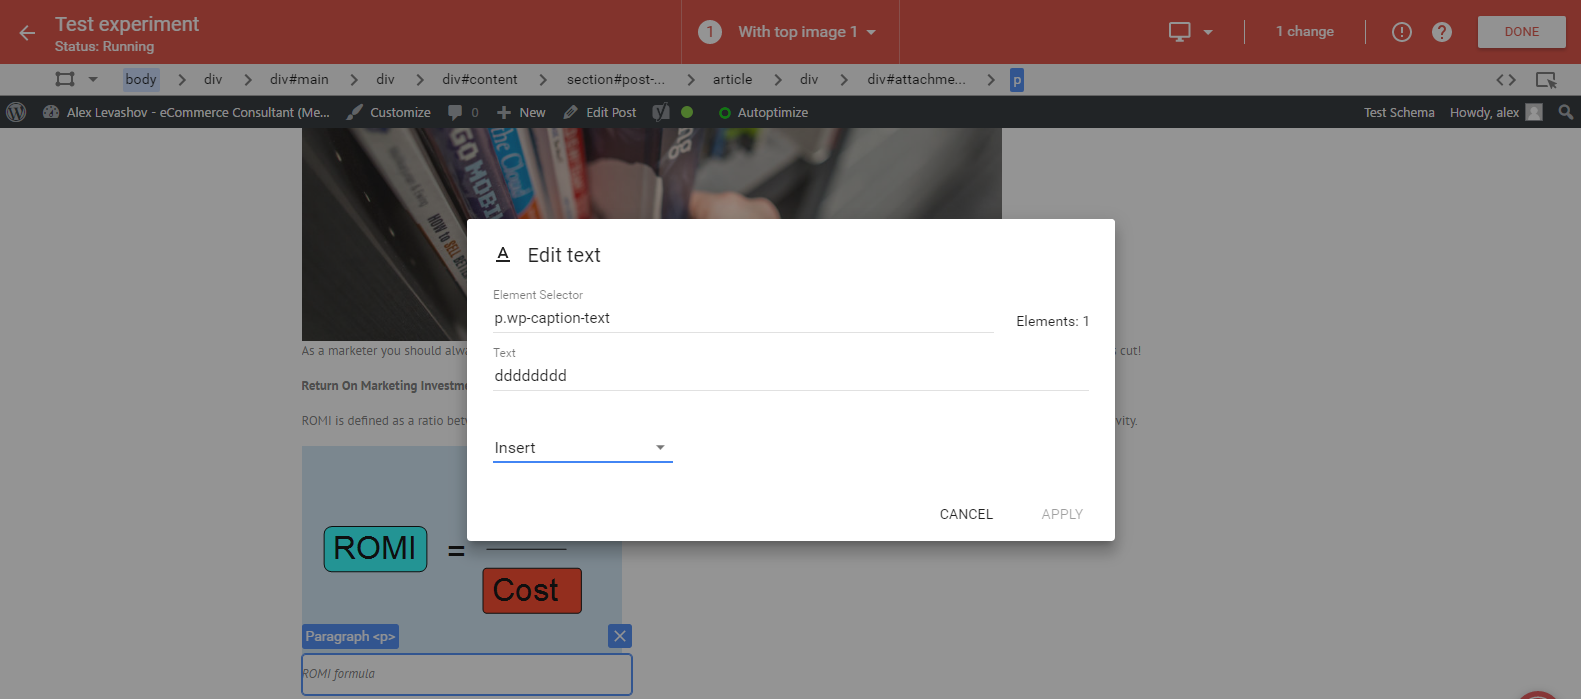
The interface is pretty intuitive and for simple changes doesn’t require advanced technical skills, but certain experience HTML/CSS doesn’t harm.
There is a possibility to preview both original and variation of the page for desktop, tablet and mobile
Running experiment
Once you happy with your page variations and settings you can start the experiment by a simple button click. If you set up everything correctly it starts to run almost immediately. When visitors come to your original page Google Optimise script checks, are they in target group and randomly show original or alternative version of the page you test.
You may check experiment results in Reporting tab if Google Optimize
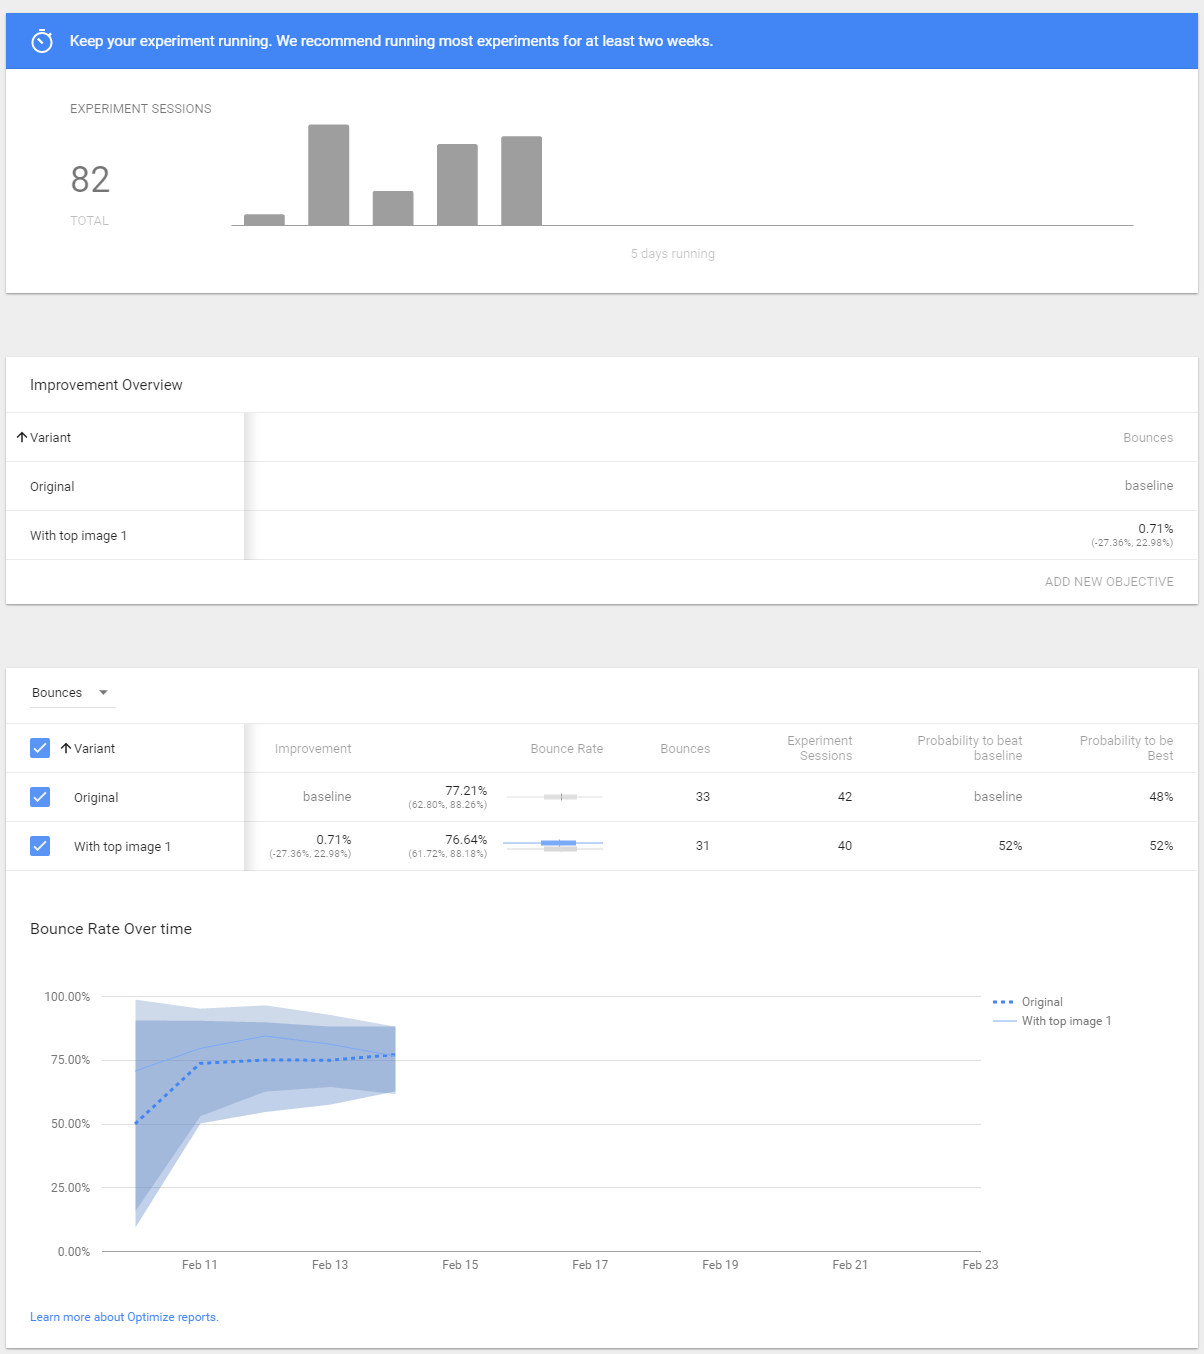
There is also automatically created report in Google Analytics available, you can check sample (PDF) – Google Optimize AB experiment Google Analytics report
As you may guess there is no big difference so far in terms of bounce rate for the page version with or without hero image.
Redirect test with Google Optimize
Redirect test is useful if you need to test very different versions of the page rather that slightly different variation.
For this test I decided to work with my ecommerce consultancy page Magento support and maintenance offer. I had been thinking about making new version if this page with more concrete support plans for a while. When I started to experiment with Google optimise, I decided it’s good time to make a (hopefully) better page and test it against original.
Here are the both pages


The difference here is that instead of creating page variation in visual editor you provide URL for a new version of the page that will take part in the experiment and replace original page for defined share of users.
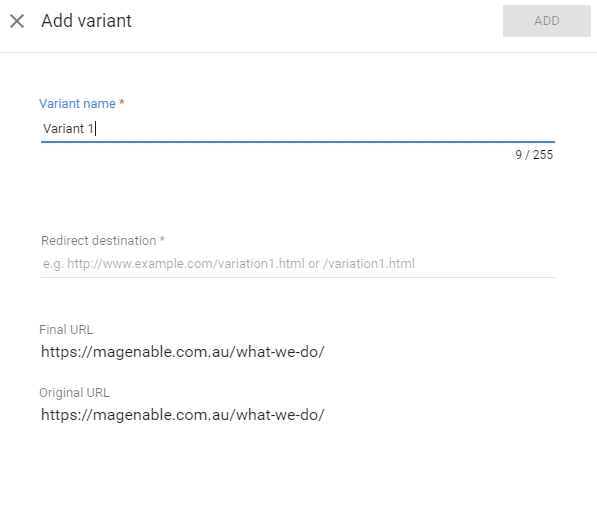
So to conduct experiment I created a new version of the page on a separate URL and added this URL as redirect destination.
As an experiment objective I set two Google Analytics goals:
- Visits of contact page with request form
- Number of submissions of this form
I also limited the targeting of users to take part in the experiment by geography, only targeting Australian users.
Conclusion
After this initial test I think that Google Optimise is quite good tool: not very hard to set-up and use, at least for people who worked with similar tools before. So far I’ve just scratched the surface and haven’t checked many advanced features of Google Optimise, but it looks promising. Taking into account that it is free, the Google Optimise is a valid option to consider when you optimise your website conversion and other metrics.